Sore shoulders after a long desk day, tight calves after a workout, and that heavy, wound-up feeling from stress can add up fast. A Massage Gun is a handheld device that uses quick pulses to press into muscle tissue, kind of like a focused, mini-massage you control at home.
Used the right way, it can help you warm up before training, loosen stiff spots afterward, and make everyday aches feel more manageable. Still, it’s not magic, and it won’t “fix” an injury or replace proper rest, mobility work, hydration, and good sleep.
In this guide, you’ll learn what a massage gun does, who it helps most, and how to choose one without wasting money. You’ll also get simple tips on how to use it safely, which areas to avoid, how much pressure to use, and how long to stay on one spot so you don’t end up more sore than you started.
If you’re pregnant, dealing with an injury, have a medical condition (like blood clot risk, nerve pain, or a bleeding disorder), or you’re on blood thinners, check with a clinician first. When safety comes first, a massage gun can be a solid tool in your routine, especially when your body needs a quick reset between work, workouts, and real life.
Massage gun basics, how it works, and what it feels like
A Massage Gun is built for one main job, fast tapping into muscle. Inside the body, a motor drives a small mechanism that pushes the attachment head in and out many times per second. That in-and-out motion creates quick pulses of pressure on your skin and the tissue underneath.
People often call this percussive therapy. In plain terms, it’s like a steady series of firm taps, not a long, slow knead. Because the pulses repeat quickly, the sensation can “flood” the area with input, which may help your body relax a tight spot and feel looser for a while. Many users also notice warmth and a mild “wake-up” feeling in the muscle, likely because the area gets moving and you naturally bring attention (and often a bit more circulation) to it.
The first time you use one, expect a few common sensations:
- Thumping or drumming on the muscle, especially on higher speeds.
- Vibration through the limb, like your hand or foot gently buzzing afterward.
- Warmth and softer tension after 30 to 90 seconds in one area.
- Mild soreness the next day if you used too much pressure or stayed too long.
If it feels sharp, zappy, or like it’s hitting a nerve, that’s a sign to back off or stop. A massage gun should feel strong but controllable, like pressure you can breathe through.
Percussion vs vibration vs foam rolling, what is the difference?
These tools can look similar on paper, but they “talk” to your body in different ways. The biggest difference is how they apply pressure, and how much control you have over the intensity.
Percussion (massage gun) uses repeated tapping with an attachment head that moves in and out. It’s focused, fast, and easy to aim.
- Pros: Quick to use, easy to target a small knot, great for hard-to-reach areas like upper back, glutes, and calves, you control angle and pressure with one hand.
- Cons: Easy to overdo, can feel too intense on very tender spots, not ideal over bony areas, can irritate sensitive tissue if you chase pain.
Vibration (vibration plate, vibrating roller, or some “massage” devices) mainly shakes the tissue without the strong in-and-out stroke. The sensation is more “buzz” than “tap.”
- Pros: Often feels gentler, can be relaxing, may be easier for beginners, less aggressive on sensitive areas.
- Cons: Can feel less effective on deep tightness, still may numb your hands or feet, some devices lack precision.
Foam rolling uses your body weight to create slow, sustained pressure. Think of it like ironing a wrinkled shirt, steady pressure over time.
- Pros: Great for slow pressure on broad areas (quads, hamstrings, upper back), helps you notice tight lines of tension, no batteries or noise.
- Cons: Harder to reach certain muscles (mid-back edges, hips, calves for some people), requires getting on the floor, pressure can be awkward to control.
A massage gun is often easier than foam rolling when you want to hit spots you can’t comfortably pin down with your body weight. That includes the back of the shoulder, around the shoulder blade (without hitting bone), or the side of the hip. On the other hand, if a spot feels very tender, slower pressure usually wins. In that case, a foam roller, a ball, or gentle hands-on work can feel safer and more tolerable than rapid tapping.
If you have to tense up or hold your breath, the pressure is too much. Back off, slow down, or switch tools.
What a massage gun can help with, and when it will not
Used with reasonable pressure, a massage gun can support comfort and day-to-day recovery. It’s best for muscle tension that builds from training, walking, stress, or long hours in one position.
Here are practical ways people use a massage gun:
- Post-workout soreness: Use light-to-moderate pressure on large muscles (quads, glutes, lats) for short passes. It can feel soothing and may help you move easier afterward.
- Tight calves from walking or standing: A few slow sweeps along the calf can reduce that “packed” feeling. Keep off the back of the knee.
- Stiff upper back from desk work: Use a low setting around the shoulder muscles. Avoid the spine and the bony top of the shoulder.
- Warm-up before training: Short, light passes can make a muscle feel more “online” before you lift or run.
- Relaxing at the end of the day: Lower speed on tired legs can feel calming, especially if you pair it with slow breathing.
Still, it has clear limits. A massage gun will not fix problems that need medical assessment or targeted rehab, such as:
- A torn or ruptured muscle
- Nerve pain (burning, tingling, electric shocks, numbness)
- Joint problems (locking, instability, sharp joint-line pain, sudden loss of range)
It’s also smart to stop right away if you notice red flags during or after use:
- Sharp or stabbing pain
- Numbness, tingling, or “zaps”
- New swelling or heat
- Bruising, especially if it spreads or appears easily
Pain is not proof it’s working. The goal is a “good hurt” at most, and often it should feel simply pleasant. When in doubt, use less pressure and shorter time, then see how you feel later.
Key terms you will see on the box (stall force, amplitude, RPM)
Specs can be confusing because brands love big numbers. A few terms matter more than the rest, and they directly affect how a massage gun feels in your hand.
Stall force is how much pressure the gun can handle before the motor slows down or stops. In simple terms, higher stall force means the device keeps moving even when you press firmly into a tight muscle. This matters if you plan to work on dense areas like glutes, quads, or calves. However, more force isn’t always better, because it can tempt you to press too hard and irritate the tissue.
Amplitude is how far the head travels in and out with each stroke. Think of it as the “depth” of the tap.
- A higher amplitude usually feels deeper and more intense, even at the same speed.
- A lower amplitude tends to feel lighter and more surface-level, which can be better for sensitive areas and beginners.
RPM (revolutions per minute) is the speed setting, basically how fast the head cycles. More RPM feels like faster tapping. Lower RPM can feel more controlled, especially when you’re trying to relax a tight spot without overwhelming it.
Besides those headline specs, real-life comfort often comes down to a few practical details:
- Noise level: A quieter gun gets used more. Loud motors can make you rush or skip sessions.
- Battery life: Short battery life becomes annoying fast, especially if you travel or forget to charge.
- Weight and handle shape: A heavy gun can tire your wrist, and awkward handles make it harder to reach your back safely.
A good rule is to buy for control, not bragging rights. Enough power to avoid stalling, enough amplitude to match your tolerance, and enough speed options to stay gentle when you need to.
How to choose the right massage gun for your body and budget
Buying a Massage Gun is a lot like buying shoes. The “best” one depends on what you’ll use it for, how sensitive your body is, and how often you’ll actually pick it up. The smartest choice is usually the one that feels easy to control, not the one with the biggest numbers on the box.
Before you compare prices, decide what you want the tool to do most days. Then choose the lowest effective power that gets the job done. More intensity can feel satisfying in the moment, but it also makes it easier to irritate tissue, especially if you’re new to percussion.
Start with your main goal: recovery, pain relief, or relaxation
Your goal sets the “personality” of the Massage Gun you should buy. Some people want a strong post-leg-day tool. Others want something gentle for neck and shoulder tension after work. Those are different use cases, and they need different features.
If your main goal is recovery (training, sports, long walks):
You’ll usually get the most value from a gun that stays consistent on larger muscles. Think quads, hamstrings, glutes, calves, and lats.
- Look for enough power to avoid stalling when you use moderate pressure.
- Choose multiple speed options so you can start low, then increase only if needed.
- A slightly heavier device can feel stable on big muscles, although it shouldn’t tire your wrist fast.
Athletes also benefit from a handle that lets you reach glutes and hips without twisting. If you can’t comfortably hold the angle, you’ll rush, and your pressure will jump around.
If your main goal is pain relief (everyday aches, tight spots):
Here, control matters more than raw power. Many “pain spots” are tender because the area is irritated, overworked, or guarding. A super-aggressive device can make you chase intensity and leave you more sore later.
- Prioritize small changes in speed (more steps or a smooth dial).
- Pick a model with a head that feels comfortable on sensitive areas (often a ball or cushioned head).
- Choose a gun that you can hold lightly. If your grip is white-knuckle tight, the session won’t help much.
Also, treat a Massage Gun as a comfort tool, not a diagnosis tool. If pain is sharp, hot, or paired with numbness or tingling, skip the gun and get checked.
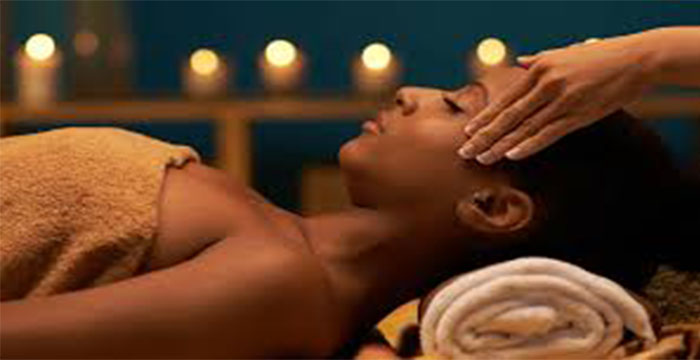
If your main goal is relaxation (stress, sleep, winding down):
Relaxation responds best to a gentle approach. High speeds and heavy pressure can wind your system up instead of calming it down.
- Aim for lower starting speeds and a “softer” feel at the head.
- Favor a quiet motor, especially if you use it at night or in shared spaces.
- Consider a lighter device if you plan to use it often on shoulders, feet, or forearms.
A simple rule that prevents most regret: start with low speed, light pressure, and short time. If it still feels good after, then you can build up next session.
Decision rule: If you’re new, sensitive, or mainly want relaxation, buy for control and comfort first. If you’re targeting big legs after training, buy for consistent power, but still use low settings most of the time.
The attachments explained (and which ones you will actually use)
Most massage guns come with a pile of heads. In real life, most people use two or three. The goal is simple: match the head to the size of the muscle and how close you are to bone.
Here’s what each common attachment does, plus the safest way to use it.
- Ball head (round): The everyday option for most bodies. It spreads force and feels forgiving.
Best for: quads, glutes, hamstrings, calves, lats, and the meaty part of the shoulder.
Watch out for: drifting onto the kneecap, shin, ankle bones, or the top of the shoulder. - Flat head: A firmer, more even pressure, like pressing with the heel of a hand.
Best for: pecs (lightly), quads, IT band area (stay on muscle, not the side of the knee), and broad back muscles.
Watch out for: ribs and collarbone area, where it can feel sharp fast. - Bullet head (pointed): Very focused, high-intensity contact. Useful, but easy to overdo.
Best for: small, stubborn knots in thick muscle (for example, upper glute or a dense spot in the calf) when you use light pressure.
Warning: don’t use the bullet on very tender spots, and don’t poke around looking for pain. It can bruise or flare up an irritated point. - Fork head (U-shape): Designed to work around a central structure, not on top of it.
Best for: along the sides of the spine (not on the bones), around the Achilles area (not directly on the tendon), and sometimes forearms.
Warning: Use the fork carefully near the neck. Stay on the thick upper traps, avoid the front of the neck, and never press into the spine. - Cushioned or air head (soft): Softer contact for sensitive days. It can still work, it just feels less aggressive.
Best for: relaxation sessions, sore calves, feet, shoulders, and anyone who bruises easily.
Watch out for: pushing hard to “make it work.” If you need tons of pressure, switch heads or lower your expectations for that session.
Two safety habits matter no matter what head you choose. First, avoid bony areas (spine, joints, collarbone, kneecap, ankle bones). Second, keep the gun moving slowly. Hovering on one point too long can turn a helpful session into next-day soreness.
Comfort and safety features that matter more than marketing
Specs matter, but comfort features decide whether you’ll use the Massage Gun consistently. If it’s awkward, noisy, or too heavy, it becomes a drawer item.
Grip, reach, and handle shape
Try to picture your most common areas: calves, quads, upper back, glutes. Now picture holding the device there for two minutes. A handle that fits your hand and allows different angles makes that easy. A slippery grip or a straight handle that forces wrist bending makes it hard.
- If you want to reach your back solo, look for a shape that lets you hold the gun without twisting your shoulder.
- If hand fatigue is an issue, a thicker grip often feels better than a thin, hard handle.
Device weight (lighter often wins)
Heavier can feel powerful, but weight adds up fast, especially when you treat shoulders or feet. For frequent users, travel, or smaller bodies, a lighter model often gets used more.
A simple test: if you can’t hold it at shoulder height comfortably, you’ll avoid using it on upper traps and upper back. That’s where many people need it most.
Speed steps vs a smooth dial
More steps usually means better control. A smooth dial is great too, as long as it’s easy to adjust mid-session.
- Steps feel simpler, especially for beginners.
- A dial can help you find a “just right” level for sensitive spots.
Either way, make sure the lowest setting is truly gentle. Some guns start too intense, which makes relaxation use frustrating.
Auto shutoff (more helpful than it sounds)
Auto shutoff keeps you from zoning out and hammering one spot too long. It’s also a safety backstop if you use the device when tired. If a model offers it, consider that a real feature, not a gimmick.
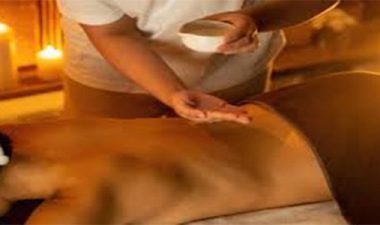
Heat or cold heads: what they really do
These heads can feel nice, but they don’t replace basic technique. Heat may help you feel looser before bed. Cold can feel calming on sore areas after activity. Still, the biggest “result” comes from pressure, time, and consistency, not from temperature add-ons.
If you buy a heat or cold head, treat it as a comfort bonus. Don’t pay extra if it pushes you over budget.
Warranty and return policy
Percussion devices have moving parts. A clear warranty and an easy return policy protect you if the battery fades, the motor rattles, or attachments crack.
Before you buy, check two things:
- How long the warranty lasts, and what it covers.
- Whether you can get replacement heads and a replacement charger.
Avoid devices that use odd, unmarked chargers. Besides being annoying, unknown power bricks can be a safety risk over time.
Noise level for shared spaces
Noise changes behavior. A loud gun makes you rush, and it can bother roommates, family, or neighbors. If you plan to use it while watching TV, after work, or late at night, put “quiet” high on your list.
- In shared spaces, choose a lower speed and a softer head to reduce sound and harshness.
- If you’re noise sensitive, prioritize a model that feels smooth in your hand, not rattly.
Simple price guide: what you get at low, mid, and high ranges
You don’t need the most expensive Massage Gun to get real value. However, very cheap models often disappoint in the same ways: inconsistent power, short battery life, and limited support if something fails. Use price as a clue, not the whole decision.
Here’s a practical way to think about tiers:
| Price range | What usually improves | Common tradeoffs | Best for |
|---|---|---|---|
| Low | Basic percussion, simple controls, usable for light sessions | More noise, less consistent power, shorter battery, weaker warranty | Beginners on a tight budget, occasional use, gentle relaxation |
| Mid | Better power consistency, smoother feel, more usable speed options, decent battery | Some add-ons you won’t use, quality varies by model | Most people, regular recovery, mixed use (legs plus shoulders) |
| High | Strong consistency under pressure, better materials, quieter operation, longer warranty | Higher cost, extra attachments inflate price | Athletes, heavy weekly use, people who want quiet plus strong performance |
No matter the tier, a few buying checks keep you out of trouble:
- Skip unknown chargers and off-brand batteries if replacements are hard to find.
- Confirm replacement parts (heads, charger, case) exist and are easy to order.
- Read independent reviews, especially from people who match your body type and use case. Pay attention to long-term notes on battery and motor noise.
Also, don’t assume “more power” means “better results.” The best sessions often happen at low to medium settings, with slow movement and relaxed breathing.
Quick decision rules (beginner, athlete, traveler, sensitive muscles)
If you want a fast way to decide, use these simple rules.
- Beginner: Choose a lighter gun with a very gentle low setting, a ball head, and a simple control layout. Consistency beats intensity.
- Athlete: Choose consistent power for legs and glutes, a comfortable grip for longer sessions, and a battery that doesn’t quit mid-week.
- Traveler: Choose compact size, lower weight, and a case that packs well. A quieter motor also helps in hotels.
- Sensitive muscles: Choose a quiet gun with more speed control and a cushioned head option. Avoid making the bullet head your default.
Screenshot checklist: choose the right massage gun fast
Use this list when you compare options on your phone.
- My goal is: recovery, pain relief, or relaxation
- Lowest setting feels gentle: yes, no
- I can hold it comfortably for 2 minutes: yes, no
- I can reach my main problem areas (glutes, calves, upper back): yes, no
- It stays consistent with light-to-moderate pressure: yes, no
- Noise seems tolerable for my home: yes, no
- Attachments I’ll actually use: ball, flat, cushioned (optional), fork (optional)
- Warranty and returns are clear: yes, no
- Replacement charger and heads are easy to get: yes, no
If you can check most of those boxes, you’re looking at a Massage Gun you’ll use often, and use safely.
How to use a massage gun safely, with easy routines for common sore spots
A Massage Gun works best when you treat it like a seasoning, not the whole meal. The goal is to calm tight muscle, reduce that “stuck” feeling, and help you move better, without leaving you tender or bruised the next day. When your technique is simple and consistent, you’ll get more benefit from lower settings than you ever will from going full power.
Think of each pass as “painting” the muscle with gentle pressure. You’re not drilling into one point, and you’re not trying to win a pain contest. Start light, stay on soft tissue, and keep your breathing slow. If you finish a session feeling looser and more comfortable, you did it right.
A beginner method that prevents bruising and overdoing it
If you’re new to a Massage Gun, your best results come from control. Intensity feels productive, but it often backfires. Use this method for the first couple of weeks, even if you think you can handle more.
Start with a simple setup: a ball head (or cushioned head), low speed, and a comfortable position where the muscle can relax. For example, sit to do calves, or lie down to do glutes. When the muscle is relaxed, the tool feels smoother and you need less pressure.
Here’s a safe baseline method you can use on most large muscles:
- Start on low speed for the first 10 to 15 seconds. Let your body “meet” the sensation.
- Place the head on the muscle, then turn it on (this prevents a sharp jump).
- Keep the head moving slowly, about 1 inch per second. Picture slow ironing, not scrubbing.
- Use light pressure first, then add a little only if the muscle stays relaxed.
- Breathe on purpose. Inhale through your nose, slow exhale through your mouth. If you hold your breath, you’re pushing too hard.
- Spend 30 to 90 seconds per area, then move on. For very tender spots, stay closer to 20 to 30 seconds.
- Keep total session time reasonable, usually 5 to 12 minutes for most people. If you’re doing a full lower body day, cap it around 15 minutes.
A helpful pressure cue: aim for a sensation you’d rate around 3 to 6 out of 10. You should be able to keep your face relaxed and your jaw unclenched.
It also helps to understand the difference between productive discomfort and a warning sign. Use this quick filter:
- “Good pain” (okay to continue): dull ache, warm pressure, a feeling that the muscle is “melting,” mild tenderness that you can breathe through, relief that lasts after you stop.
- “Bad pain” (stop or change something): sharp or stabbing pain, pinching at a joint, a zinging or electric feeling, numbness or tingling, pain that makes you tense up, pain that gets worse each second you stay there.
If the muscle tightens against the tool, you’re not releasing it. Lower the speed, lighten pressure, or move to a nearby area.
How often should you use it each week?
Most people do well with 3 to 5 days per week for general tightness. On training weeks, you can use it after workouts, and also on rest days for gentle recovery. If you bruise easily or stay sore долго after, cut it back to 2 to 3 days per week and keep sessions shorter.
Finally, don’t stack intensity on intensity. If you did a hard leg workout, then a long Massage Gun session, then aggressive stretching, you may feel worse tomorrow. Pick one main recovery tool per day, and keep it gentle.
Quick routines for legs, back, shoulders, and feet (5 to 12 minutes)
These routines are meant to be simple. Use low-to-medium speed, light-to-moderate pressure, and slow movement. If a muscle feels extra sensitive, shorten the time and stay on the softer head.
Before you start, do one quick check: get into a position where the target muscle can relax. Tension in your body makes the Massage Gun feel harsher.
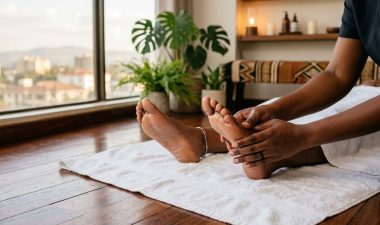
Routine 1: Calves and feet after walking (about 5 to 8 minutes)
Long walks can load the calves and the bottom of the foot. This routine helps most when you stay off the ankle bones and avoid the back of the knee.
- Calf (gastrocnemius), 60 seconds per side: Start mid-calf, then glide upward toward the knee on the meaty part. Keep the head moving in slow lines, don’t hover behind the knee.
- Lower calf (soleus), 45 seconds per side: Bend your knee slightly to soften the calf. Work lower and toward the inner calf, still avoiding the Achilles tendon itself.
- Foot arch, 30 seconds per foot: Use a soft head. Lightly trace the arch from heel toward the ball of the foot. If it feels too intense, stop and switch to a ball or manual massage.
- Peroneals (outer lower leg), 30 to 45 seconds per side: Place the head on the outer calf, then move up and down in a short range. Stay on muscle, not the shin bone.
Finish by standing up and doing 3 slow calf raises, only through a comfortable range. The goal is to reintroduce movement, not to stretch hard.
Routine 2: Quads and glutes after workouts (about 8 to 12 minutes)
This is a great post-workout routine because these muscles can take a Massage Gun well, as long as you avoid joints and bony points.
- Quads front thigh, 60 to 90 seconds per side: Start mid-thigh and sweep up toward the hip. Avoid the kneecap and the top edge of the pelvis. If you find a tender spot, slow down over it for 5 to 10 seconds, then keep moving.
- Inner quad (VMO area), 30 to 45 seconds per side: Work the inner front thigh gently, moving upward and slightly inward. Stay away from the knee joint line.
- Glute max, 60 to 90 seconds per side: Sit or lie on your side so the glute relaxes. Move in slow passes from the outer hip toward the center of the butt muscle, staying on the soft part.
- Side hip (glute med), 45 to 60 seconds per side: Place the head on the side pocket area of the hip, then sweep up and down in a small range. Avoid the bony point of the hip (it feels sharp fast).
If your lower back tends to compensate, keep pressure lighter on glutes. Too much force can make you arch and tense.
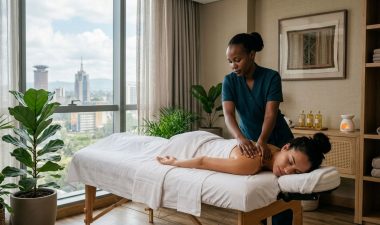
Routine 3: Upper back and shoulders after desk work (about 6 to 10 minutes)
Desk tension often sits in the upper traps, the shoulder blade area, and the chest. The trick is to stay on muscle and avoid the spine, collarbone, and the bony top of the shoulder.
- Upper traps (top of shoulder muscle), 45 to 60 seconds per side: Keep the head on the “meaty slope” between neck and shoulder. Move from shoulder outward toward the neck base, but stop before the front of the neck.
- Shoulder blade border (rhomboids area), 45 to 60 seconds per side: Reach across your body to expose the shoulder blade area. Glide along the muscle beside the shoulder blade, not on the bone.
- Rear shoulder (posterior deltoid), 30 to 45 seconds per side: Use light pressure. Sweep in small circles on the back of the shoulder, staying away from the joint itself.
- Pecs (front chest), 20 to 30 seconds per side: Very light pressure only. Work just below the collarbone area, closer to the shoulder. Move from the shoulder inward, then stop. If this feels sharp, skip it.
Afterward, roll your shoulders slowly 5 times, then do 5 gentle neck turns (no forcing). Most people feel looser right away when they combine short soft-tissue work with easy motion.
Routine 4: Forearms and hands for phone or computer strain (about 5 to 7 minutes)
Forearms get tight from gripping, typing, and scrolling. This routine helps when you stay away from the wrist bones and keep the pressure light. A flat head can work well here, but a ball head is often more comfortable.
- Forearm flexors (palm side), 45 seconds per side: Rest your forearm on a pillow or thigh. Start below the elbow and glide down toward the wrist, stopping before the wrist crease.
- Forearm extensors (top side), 45 seconds per side: Turn the forearm palm-down. Sweep from mid-forearm toward the elbow, then back down. If you feel a “zing,” lighten pressure.
- Thumb pad and palm, 20 to 30 seconds per side: Use the softest head and lowest speed. Trace the thumb pad in tiny circles, then glide across the center of the palm.
- Between thumb and index (first web space), 15 to 20 seconds per side: Very gentle only. Stay brief here because the area can be sensitive.
Wrap up with 5 slow open-and-close hand reps. Then shake your hands out like you’re flicking water off your fingers.
Routine 5 (optional): Low back support without hitting the spine (about 5 to 8 minutes)
If you carry tension near the low back, focus on the muscles next to the spine (not on it) and the glutes. Never run the Massage Gun directly over spinal bones.
- QL area (side of low back), 30 to 45 seconds per side: Place the head on the thick muscle above the hip, to the side of the spine. Move up and down in a short range.
- Upper glutes, 45 to 60 seconds per side: Work the top of the butt muscle where it meets the low back. Sweep from outer hip inward.
- Lats (side back), 45 seconds per side: Place the head under the armpit area on the side of the back. Move downward toward the ribs, staying on muscle and avoiding bone.
If back pain is sharp, new, or shooting down the leg, skip this routine and get checked.
Areas to avoid and who should ask a doctor first
A Massage Gun is designed for soft tissue, not delicate structures. When people get into trouble, it’s usually from using too much pressure, staying too long, or going over a risky spot.
Use this as your simple “don’t use it here” list:
- Front of the neck and throat area: Too many sensitive structures live here.
- Spine bones (neck, mid-back, low back): Don’t run the head over vertebrae.
- Joints and joint lines: Knees, elbows, ankles, wrists, shoulders, and hips need care. Stay on the surrounding muscle instead.
- Bruises, swelling, or fresh pain: If it’s already irritated, percussion can make it worse.
- Open skin, rashes, or infections: Avoid spreading irritation and avoid pain.
- Varicose veins or areas with visible vein issues: Skip them completely.
- Numb areas or places with reduced sensation: If you can’t feel well, you can’t judge pressure safely.
- Directly on bony points: Collarbone, shin, kneecap, ankle bones, and the point of the hip.
Also avoid sensitive zones behind joints, especially the front of the elbow and back of the knee, where nerves and vessels are more exposed.
Some people should check with a clinician before using a Massage Gun, even if it seems like a minor ache. This doesn’t mean you can’t use one, it means you should get clear guidance first:
- Blood thinners (or you bruise very easily): Risk of bruising and bleeding under the skin goes up.
- History of blood clots, clotting disorders, or unexplained swelling: Percussion over the wrong area is a bad idea.
- Pregnancy: Ask your OB or midwife, especially before using it on the low back, hips, or legs.
- Recent surgery or a recent injury: Healing tissue needs a plan, not guessing.
- Chronic conditions that affect nerves or circulation: For example, neuropathy, advanced diabetes complications, or severe vascular disease.
- Ongoing nerve symptoms: Tingling, numbness, burning pain, or shooting pain down an arm or leg.
When in doubt, treat the Massage Gun like you would a strong cup of coffee. Some people do fine, others get jittery fast. Start small, see how you feel the next day, then adjust.
Massage gun vs a professional massage, and how to combine both
A Massage Gun is great for quick, targeted work at home. It can warm up a muscle before a workout, calm tight legs after walking, and take the edge off desk shoulders. You control the time, and you can do it in five minutes while the kettle boils.
Still, it has limits. It can’t “read” your body the way trained hands can. It also can’t adjust pressure moment to moment based on your breathing, posture, and referral patterns (like when a tight chest contributes to shoulder tension). A professional massage therapist can assess how you move, spot patterns, and work with the whole system, not just one sore patch.
Here’s a practical way to compare them:
- Massage Gun at home: best for short sessions, broad muscle groups, and maintenance between workouts or long workdays. It’s also useful when you want consistency and simple relief.
- Professional massage: better for full-body flow, deeper relaxation, hands-on assessment, and careful work around tender areas. It can also help when tightness keeps returning because the cause might be elsewhere.
The sweet spot is combining both without overloading your body. Try this balanced plan:
- Use the Massage Gun 3 to 5 days a week for quick maintenance (5 to 10 minutes).
- Keep it gentle on sore days. If you’re already tender, cut time in half and stay on low.
- Book a professional session when issues repeat. If the same shoulder tightness returns every week, you likely need more than spot work.
- Don’t do everything on the same day. If you get a deep massage, skip the Massage Gun that night and let your body recover.
A simple rule helps you decide: if you can’t relax into the sensation at home, you’re past what a Massage Gun can do safely that day. That’s when skilled hands, calm pacing, and a full treatment plan make the bigger difference.
Conclusion
A Massage Gun works best when you match it to your goal, then keep the settings simple. For recovery, pick steady power that does not stall on big muscles. For everyday tightness or relaxation, comfort wins, a lighter feel, a quiet motor, and a truly gentle low speed. In any case, you will use the ball head most, add a flat head for broad areas, and treat the bullet head like a once-in-a-while tool, not a default.
Safety stays the same no matter the model. Start low, use light pressure, and keep it moving. Stay on soft tissue, avoid joints, the spine, the front of the neck, and any area with swelling, bruising, numbness, or sharp pain. If your body tenses, ease up, because control is what makes this tool helpful.
Thanks for reading. Choose one routine from this guide to try three times this week, keep it to 5 to 10 minutes, then reassess how your body feels the next day and adjust from there.